Wednesday, December 20, 2023

BPM/IBFS - Here We Come A-Caroling

Welcome back to Paper Play, friends!

It's hard to believe that Christmas Eve is only four days away.  The weeks leading up to the holiday just seem to fly by so fast.  I was able to squeeze in a viewing of A Christmas Carol, which is one of my favorite Christmas movies.  (Side note: I enjoy both the 1938 and 1951 versions, but prefer the 1938 one!)  It always helps put me into the Christmas spirit.  That's why I knew that I had to make a card with the stamp featured on today's card - Vintage Style Christmas Carolers.  It looks like they stepped right out of Victorian England!


Here's what I used to make it:

Here's how I made it:

  • Stamped the holly & berries stamp from the Beyond the Border set horizontally in alternating gold, evergreen, and cranberry rows onto a 4.5"x6.5" white card panel.
  • Cut an oval from the center of the stamped card panel using an oval die.
  • Ran gold ink along the inside of the oval and along the outside of the white panel.
  • Cut the Beautiful Christmas Tide paper to 4.5"x6.5", stamped the carolers onto it using black ink, stamped it again using clear embossing ink, then applied clear embossing powder to the stamped image, and set it with a heat tool.
  • Colored the stamped image with alcohol markers.
  • Applied some Antique Linen ink with a blending tool.
  • Placed double sided tape to the back of the card panel and adhered it on top of the sheet music paper.
  • Placed double sided tape onto back of card panel and adhered it to a 5"x7" green card base.
  • Stamped the words A Merry Christmas onto a strip of green card stock using gold ink, cut the strip to size, and adhered it to the inside of the oval with double sided tape.
  • Ran gold ink around the edges of the green card base.
  • Placed pearl stick on jewels in the corners of the white card panel


I really like this card.  It reminds me of A Christmas Carol and helps me feel the Christmas spirit.  I hope that you enjoyed today's post and wish you a wonderful holiday!

Until next time . . . be well!

Wednesday, December 13, 2023

Creating with the Gecko Galz - December 2023

Happy December, friends!

Thanks for stopping by Paper Play to see what's new.  It's hard to believe that the month is already half-way over and that Christmas is less than two weeks away.  I've been busy crafting design team monthly projects, gifts for friends and family, and Christmas cards.  Speaking of which . . . today I'm sharing my creations for the Gecko Galz design team.

First up is one of two tags that I created for our 25 Tags of Christmas event on the Gecko Galz blogComfort and Joy was made by: shrinking a digital stamp from the Christmas Traditions set of digital stamps, coloring it, adding some grit paste, adding some grunge with Antique Linen Distress Spray Stain, framing it with these beautiful gold frames and a sentiment from the Compliments of the Season kit, and adding some ribbon.  I fell in love with this digital stamp as soon as I saw it.  It looks like an idyllic Christmas morning to me.


My second tag will be shared on December 22nd . . . stay tuned!

The next shares are all my creations for the December challenge.  The theme for the month was Winter Elegance.  My interpretation of the theme was focused on finding that elegance in everyday life.  I showcased the products used with bits of sparkle and glitz to add the elegance.

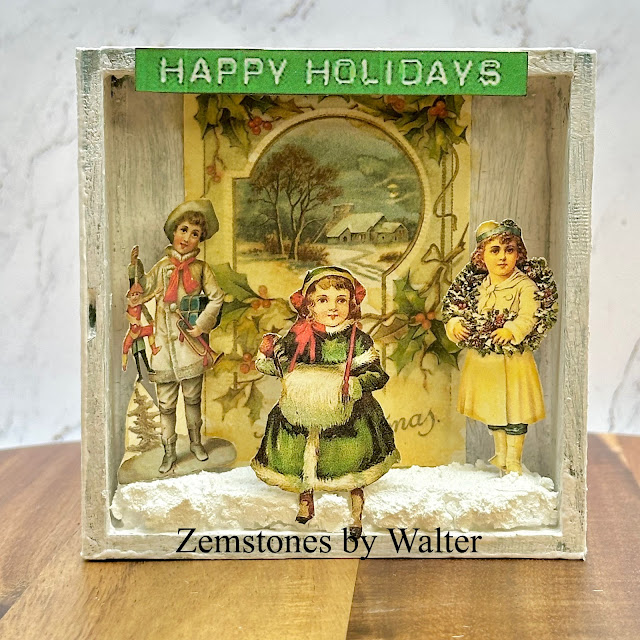
This beautiful Victorian winter shadow box was made with two different Gecko Galz collections.  The background picture is from Merry Little Christmas and the rest of the items are from  Christmas Spirit.  I started by painting the square wood shadow box with some Patina colored chalk paint, applied a coat of crackle medium, and then applied Oatmeal colored chalk paint over it.  This process achieved a crackle look that made it look like it was older and had been painted over a few times.  Once dry, I glued the background image inside of the box.  I then applied grit paste the a piece of styrofoam and glued it to the inside bottom of the box.  I fussy cut the images, glued stick pins to the back of them, and stuck them in place inside of the shadow box.  The sentiment was attached to the top with some double sided foam tape.  I sent this as a gift to my dear friend Kathy and I'm happy to say that she loved it!


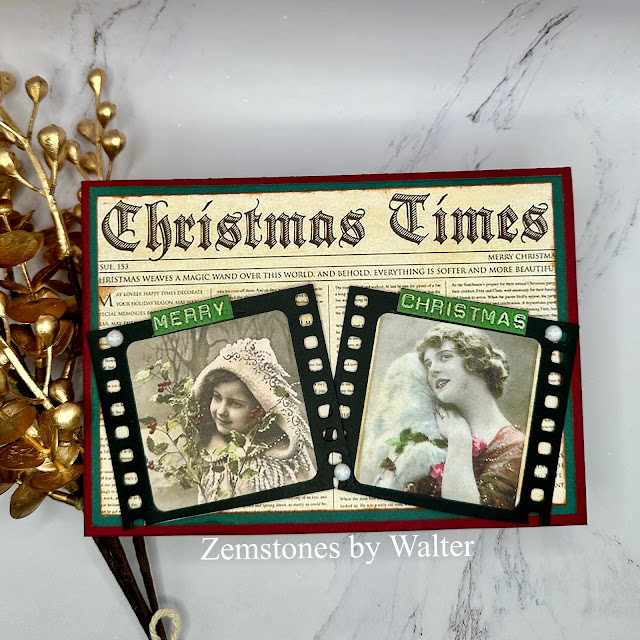
My two Christmas cards were made with images and paper from Christmas Spirit and Compliments of the Season.  I love these images so much and wanted to showcase them in a beautiful way.  I aged the photos and background papers by distressing the edges with a plastic knife and then running some Tea Dye Distress Ink around the edges.  I also applied some of the ink to the paper for some added grunge.  The result is vintage Christmas cards that will bring a smile to anyone.


Last, but certainly not least, are my vintage Christmas ornaments made with images from Christmas Spirit.  They are SO easy to make and (now, I may be a little biased!) beautifully elegant.  The hardest part of making them is cutting the hole in the front of the ornament.  The ones that I used were made of a thicker plastic so I used by Dremel tool and the circular cutting blade to cut the shape.  It takes a little bit of a steady hand, but the blade glides through it like butter.  It may take a couple of passes to get the shape as you like it.  I then used the sanding attachment and sanded down the sharp edges.  Note that you may use an exacto knife if you don't have a Dremel tool, but it may take a little longer and require more pressure if the plastic is on the thicker side. It's all smooth sailing once the holes are cut!  I painted a base coat of chalk paint on each (Patina on two, Frost Blue on the other), let it dry, and then applied a coat of crackle medium.  Next, I added some extra fine white glitter to my top coat color, mixed it up, and painted it on.  I did also paint the inside of each ornament with a couple of coats of this glitter paint.  I used super glue to attach a small piece of styrofoam to the inside bottom of the ornament.  Once dry, I glued one of the images to that piece of styrofoam to keep them in place.  I had previously made outside decorative pieces with some moldable foam clay and moulds.  I painted them and attached to the ornaments with glue.  Grit paste was added around the hole to give it a little extra snow effect and dimension.  Here's a tip for you - the grit paste can also hide any imperfections made from cutting the hole!  Made an oopsie?  Cover it with grit paste or glitter glue!  Let's keep that secret between us, okay?!  The last step was to apply some gems (pearls and silver balls) to the ornaments.


I hope that you enjoyed reading about my inaugural projects as a member of the Gecko Glaz design team.  Let me know in the comments if you have any questions about the steps outlined above - I'll be sure to answer them for you!

 I wish you and your loved ones the merriest of holidays and my heartfelt best for 2024!  Until next time . . . be well!

Sunday, December 10, 2023

BPM/IBFS - May You Never Be Too Old

Hi there, crafty friends!

Thanks for stopping by Paper Play today!  The holiday season is in full swing and Christmas magic is in the air.  Today's post is all about that.  I have always loved the saying, "May you never be too old to search the skies on Christmas Eve."  It's so nostalgic for me - it brings back Christmas memories from my childhood and the good times that we had as a family.  Not to sound too corny, but those really were different, and in some ways much nicer times: spending time with family, the excitement and anticipation of Santa Claus visiting, and the magic of the season as seen through a child's eyes.

The card that I'm sharing today on the Blank Page Muse blog today captures that magic.  It has a vintage feel to it thanks to the wonderful rubber stamps designed and sold by Blank Page Muse.


Here's what I used to make it:

Here's how I made it:

  • Stamped the village in black ink onto a horizontal 4.5"x6.5" white card panel
  • Made a stamping mask by stamping the village onto masking paper, fussy cut it out, and placed it over the stamped image on the card panel.
  • Sprayed card panel with Stormy Skies spray ink and then with Winter Frost Spray Mica
  • Used a heat tool to dry the panel.
  • Sprayed some white ink spray onto my glass craft surface, spritzed it with water, and used a paint brush to add some "snow flakes" to the sky.
  • Removed the stamping mask from the village and colored it with alcohol markers.
  • Inked one of the trees from the Beyond the Border Christmas stamp set with Evergreen ink and stamped it next to the village; repeated this two more times for a total of three trees.
  • Used a pallet tool to add opaque grit paste to add snow to the ground around the village and trees.
  • Used a paint brush to add some opaque grit paste to roof tops and bushes.

  • Stamped Santa & sleigh onto a piece of white card stock; colored the image with alcohol markers and fussy cut it out with detail scissors.
  • Stamped the sentiment with white pigment ink in the upper left hand corner of card panel and dried it with a heat tool.
  • Added double sided foam tape strips to the back of the Santa & sleigh image and adhered it to the sky in the card panel.

  • Adhered double sided tape to the back of card panel and centered it onto a 5"x7" navy blue card base.

These stamps are gorgeous and work so well together!  I love this country cottage stamp and think that I'll be creating seasonal cards to show life in this village.

My hope is that this card invokes some wonderful Christmas memories for you and helps you believe in the magic of Santa Claus this holiday season.  I'd love to hear from you if it did!  Please consider sharing a comment with a favorite Christmas memory, favorite Christmas movie, or whatever you may like to share.

Thanks again for spending some time with me on Paper Play today.  Until next time . . . be well!


A Peaceful Wish - Tuesday Morning Sketches #774

Hello, friends! Welcome back to Paper Play.  Today’s post is for Tuesday Morning Sketches #774.  The sketch used is the second pic below.  M...