Thanks for coming back to Paper Play, friends!
Today's post has special meaning for me since it's about my 10th, and final, course for AECP Level 1. I was a little nervous when I entered the program back in early March and thought that 10 courses was a little daunting. I wondered how long would it take me to complete all 10? I quickly realized that the courses were full of inspiration and encouragement, and I started to quickly go through them. It became a bit of a balancing act for me since I, like many of you, also have a day job that funds my creative journey. But I found that the program was my proverbial "carrot dangling on a stick" - staying focused on getting through spreadsheets and analysis in order to wrap up the work day and create. And now, about a month and a half later, here I am writing my blog post for a course that I truly enjoyed and that encouraged lots of creativity, Irresistible Inking Techniques.
The course was a perfect bookend to Level 1 for me since my first class focused on layered stamping and this one on ways to use inks other than traditional stamping. I made two cards for it, which I present to you below.
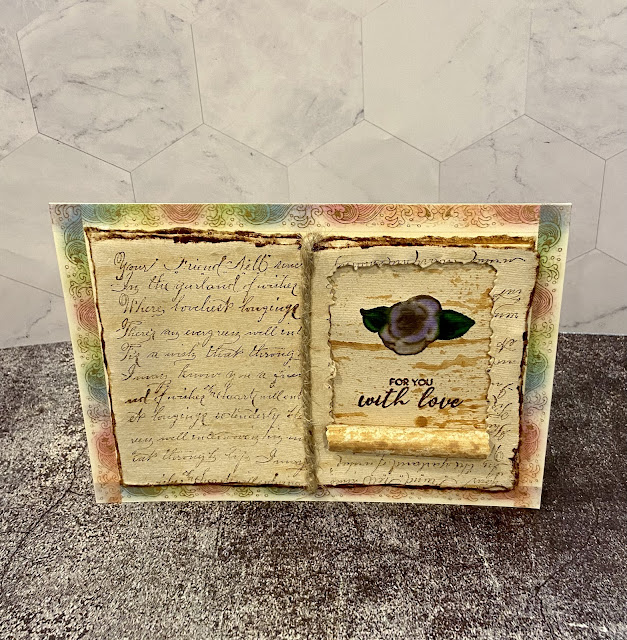
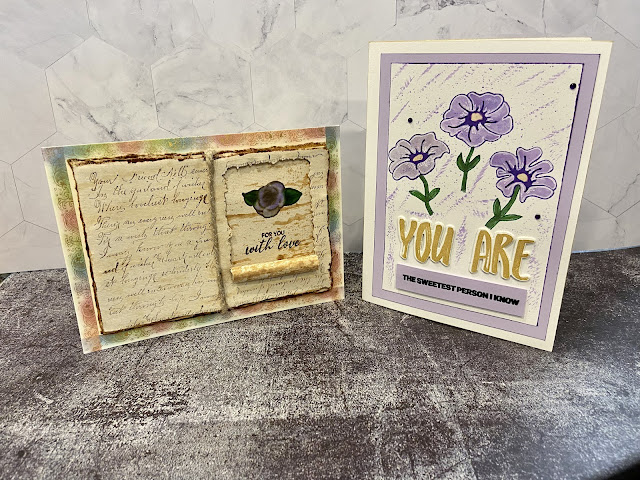
Card 1
- Stamped some Vintage Photo distress ink on my glass work surface and misted it with water. Ran my braying tool through it to pick up the ink and rolled it over a few pieces of vintage deckled edge paper that was the perfect size to look like an open journal. I repeated this a couple of times to give the paper an older look.
- Once the paper was dried, used an ink brush and Antique Linen distress ink to add a further vintage look to the paper.
- Used the background stamp and the Ground Espresso distress ink to stamp the writing on each of the two pages of the first sheet.
- Put the second piece of paper behind the stamped piece and ran one side through my die cutting machine with a torn paper die. It's important to note that I didn't run it completely through as I didn't want this piece to be fully cut out - just partly cut.
- Added the third piece of paper behind the second, scored all three pieces in the middle on my scoring tool, ran some glue along the score lines on the second and third piece, lined up all three pieces of paper, and pressed them together. I know had the pages of the journal arranged.
- Took the Vintage Photo distress ink and used the technique of running it around the edges of the journal to give a more aged look and help each page stand out from the others.
- Rolled up the partially cut two pieces of paper, placed some craft glue along the bottom of the roll, and adhered it to the page. This reveals the space where the message is hidden in the journal.
- Stamped the small flower outline using Ground Espresso ink onto the hidden message area; layer stamped the other parts of the flower using their stamps and Wisteria, Hydrangea, Shadow Creek, and Evergreen inks.
- Stamped the sentiment using Ground Espresso distress ink.
- Ran the piece of twine down the center of the paper and used craft glue to adhere it to the back of the journal pages.
- Placed doubled sided foam tape on the back of the journal; placed an extra piece on the left and right sides of the journal to help make it look like its lying open.
- Adhered the journal to a 5x7 cream card stock base.
- Ran the washi tape along the border to give a little extra color and printed image to the card.
I really like the resulting look of the card. It would make a beautiful anniversary card, birthday card, or thinking of you card. Does it make you think of the song lyric above?
Card 2
- Stamped the three flower outlines onto a 4x6 piece of white card stock using the Ultraviolet ink.
- Stamped some Wisteria and Hydrangea ink onto my glass work surface, misted it with water, and used the technique of water coloring with ink to color the flowers with a paint brush.
- Stamped some Sunkissed ink onto the glass work surface, misted it with water, and colored the flower centers with a paint brush.
- Stamped some Shawdow Creek ink onto the glass work surface, misted it with water, and painted flower stems and leaves. I then used the green fine tip pen to outline the stems and leaves.
- Used the white gel pen to add some additional detail to flower petals.
- Ran the Ultraviolet ink around the edges of the white paper and used double sided tape to adhere it to a light purple 5x6.5 sized piece of card stock.
- Stamped the words You Are using the gold shimmer ink and used the corresponding die to cut them out. Then cut out an additional 4 more sets of the words. Glued all five sets together, making sure that the gold set was on top, and glued the words onto the white card panel.
- Cut a small piece of the light purple card stock and stamped the expression The Sweetest Person I Know using jet black ink. Adhered that piece onto the white panel, underneath the words You Are, using double sided foam tape.
- Stamped some more Wisteria ink onto glass surface, misted it with water, and used a paint brush to add some ink splatters to the top portion of the white panel. I Then used the paint brush and ink to add some brush marks to various places on the white card panel.
- Ran the Ultraviolet ink around the edges of the purple card stock, and used double sided tape to adhere it to a 5x7 white card base.
- Added three small purple gems to the card front.
The second card is finished! It's light, whimsical, and perfect way to tell someone how you feel about them.
That wraps up this post on Irresistible Inking Techniques. Until next time . . . be well!


Love the vintage look - beautifully done! - Heidi Rhodes
ReplyDeleteThank you so much, Heidi! And thank you for checking out my blog!
DeleteWalter, two amazing cards here but I am drawn to the scroll on the vintage one, just stunning x
ReplyDeleteThanks very much, Annie! The vintage one is a favorite of mine, too.
Deleteoh man.. Walter.. I never know what you will come up with next!! Your work is wonderful! Keep it up!!
ReplyDelete